前回、cmark[1]でCommonMark[2]のASTをXML形式で得られることを確認しました。
記事中で登場するコードの動作についての保証はできかねます*1。ご了承ください。
今回の記事で使用した環境は次になります。
- Windows 10 Home 1909
- MSXSL V6.0
- cmark 0.29.0
- Antenna House XSL Formatter V7.0 MR3
文書はその目的に適した構造を持ち、組版では多くの場合その構造に沿ってマークアップを行うでしょう[3]。
Markdownはそれらを放棄しているために、文書として組版するためには不足するものを補う必要があります*2。基本的には、「レポート」であるならレポートの見た目になるよう、Markdown文書とレポートの対応関係を用意する必要があるということです。例えば「<heading level="1">のテキストをレポートのタイトルとする」として、「レポートタイトルはフォントサイズは本文の2倍、中央寄せ、前後のアキは……」とスタイルを用意していきます。書籍を組むのであれば目次や索引などが補う対象となります。
記法の数が比較的少ないCommonMarkとはいえ、すべての対応関係について記述するのは労力が大きいため、一部のみとします。また、前回言及した「Markdown + XSL → PDF」[4]の記事ではリンク記法を応用して脚注記法を用意していますが、処理が複雑化しますのでこういった応用もしません。
変換するCommonMark文書
# CommonMark文書をAH XSL FormatterでPDFにする
## はじめに
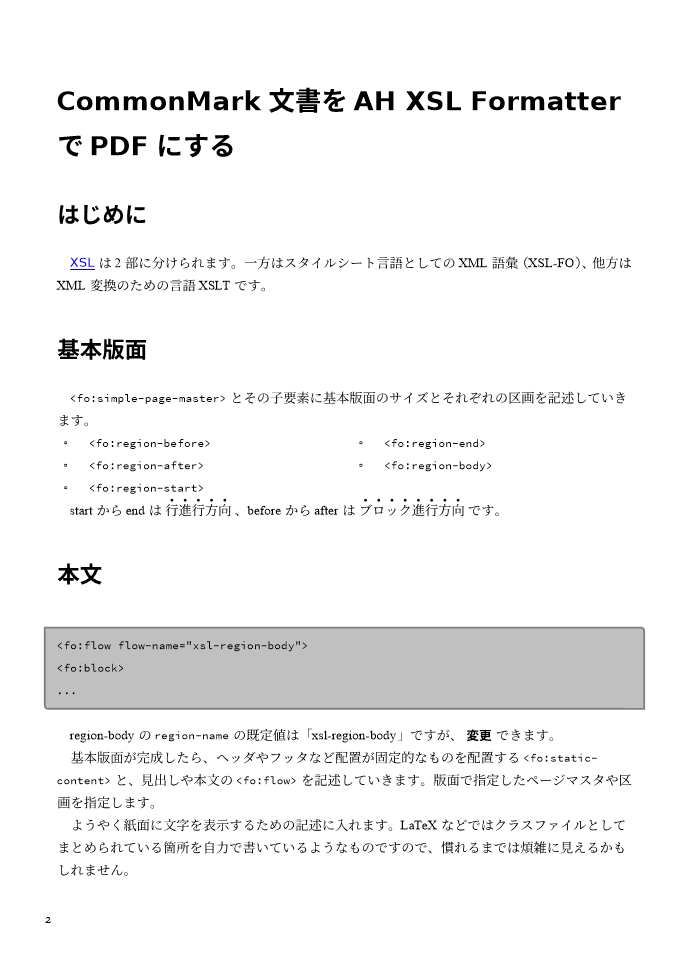
[XSL](https://www.w3.org/TR/xsl/)は2部に分けられます。一方はスタイルシート言語としてのXML語彙(XSL-FO)、他方はXML変換のための言語XSLTです。
## 基本版面
`<fo:simple-page-master>`とその子要素に基本版面のサイズとそれぞれの区画を記述していきます。
* `<fo:region-before>`
* `<fo:region-after>`
* `<fo:region-start>`
* `<fo:region-end>`
* `<fo:region-body>`
startからendは*行進行方向*、beforeからafterは*ブロック進行方向*です。
## 本文
```xml
<fo:flow flow-name="xsl-region-body">
<fo:block>
...
```
region-bodyの`region-name`の既定値は「xsl-region-body」ですが、**変更**できます。
基本版面が完成したら、ヘッダやフッタなど配置が固定的なものを配置する`<fo:static-content>`と、
見出しや本文の`<fo:flow>`を記述していきます。版面で指定したページマスタや区画を指定します。
ようやく紙面に文字を表示するための記述に入れます。LaTeXなどではクラスファイルとしてまとめられている箇所を自力で書いているようなものですので、慣れるまでは煩雑に見えるかもしれません。
XMLへの変換
このCommonMark文書をPDFに変換します。
cmarkによるCommonMark文書のXML変換はコマンドライン操作になります。標準出力に出力されるため、出力結果をファイルに書き込んでいます。変換結果のXMLで文字化けがしていたら、コマンドラインの文字コード設定などが関係しているかもしれません。
> cmark.exe doc.md -t XML > result.xml このXMLをXSLTで変換し、得られたFOをAntenna House XSL FormatterでPDFへと変換します。先に結果を見てみましょう。
PDF出力結果

源ノ明朝、源ノ角ゴシックを使用したPDFが出力されています。欧文はTimes New RomanとDeja Vu Sansです。
XSLTの抜粋
AH Formatterではソフトウェア側の設定をあまり弄らずともOpenTypeフォントを使用できます。
<!-- XSLT -->
<xsl:attribute-set name="mainfont">
 <xsl:attribute name="font-family">Times New Roman, 源ノ明朝</xsl:attribute>
 <xsl:attribute name="font-size">14q</xsl:attribute>
 <xsl:attribute name="line-height">1.7</xsl:attribute>
</xsl:attribute-set>
<xsl:template match="/">に<fo:root>を置きます。
<xsl:template match="/">
 <xsl:variable name="varAuthor" select="'アンテナハウス'" />
 <xsl:variable name="varTitle"><xsl:text>CommonMarkからXSL-FOでPDFを作る</xsl:text>
</xsl:variable>
 <xsl:variable name="varMainPageName" select="'main'" />

 <fo:root xsl:use-attribute-sets="attsRoot">
 <!-- 基本版面 -->
 <xsl:call-template name="layoutMasterSet">
 <xsl:with-param name="mainPageName" select="$varMainPageName" />
 </xsl:call-template>
 <!-- 表紙 -->
 <xsl:call-template name="coverPage">
 <xsl:with-param name="mainPageName" select="$varMainPageName" />
 <xsl:with-param name="author" select="$varAuthor"/>
 <xsl:with-param name="title" select="$varTitle"/>
 </xsl:call-template>

 <!-- 文書内容 -->
 <fo:page-sequence master-reference="{$varMainPageName}"
 xsl:use-attribute-sets="attsPageSequence">
 <xsl:apply-templates />
 </fo:page-sequence>
 </fo:root>
</xsl:template>

<xsl:template match="md:document">

 <xsl:call-template name="header">
 <xsl:call-template name="footer" />
 <fo:flow flow-name="xsl-region-body">
 <xsl:apply-templates />
 </fo:flow>
</xsl:template>
基本版面についてはMarkdown側で干渉するところは特にないので名前付きテンプレートとして省略しました*3。coverPageテンプレートで本文とは別に表紙を作っています。
著者情報を「レベル1見出しの直後の段落を著者名にする」といった形でMarkdown側で記述するようにもできるでしょうが、
やはり「Markdownでは記述しない箇所を決める」という割り切りがある程度の単純さを保つために必要に思えます。
ブロックの例を見てみましょう。
<xsl:attribute-set name="attsCode">
 <xsl:attribute name="font-family">Source Code Pro, 源ノ角ゴシック Code JP, monospace</xsl:attribute>
 <xsl:attribute name="font-size">12q</xsl:attribute>
 <xsl:attribute name="xml:space">preserve</xsl:attribute>
</xsl:attribute-set>

<xsl:attribute-set name="attsCodeBlock" use-attribute-sets="attsCode">
 <xsl:attribute name="linefeed-treatment">preserve</xsl:attribute>
 <xsl:attribute name="axf:border-bottom-left-radius">3pt</xsl:attribute>
 <xsl:attribute name="axf:border-top-right-radius">3pt</xsl:attribute>
 <xsl:attribute name="border">solid 1.5pt gray</xsl:attribute>
 <xsl:attribute name="background-color">silver</xsl:attribute>
 <xsl:attribute name="padding">3mm</xsl:attribute>
 <xsl:attribute name="space-before">4mm</xsl:attribute>
 <xsl:attribute name="space-after">4mm</xsl:attribute>
</xsl:attribute-set>

<xsl:template match="md:code_block">
 <fo:block xsl:use-attribute-sets="attsCodeBlock">
 <xsl:apply-templates />
 </fo:block>
</xsl:template>コードブロックです。CommonMarkのASTにはinfoとして最初の行の```xml、「xml」が格納されていますが、
1からシンタックスハイライトを行うのはつらいので、背景色やボーダー、等幅フォントを指定しています。< xsl:templatye match="md:code_block">の箇所はかなりシンプルにできていますね。
<xsl:attribute-set name="attsListBlock">
 <xsl:attribute name="space-before">1rem</xsl:attribute>
 <xsl:attribute name="space-after">1.4rem</xsl:attribute>
 <xsl:attribute name="provisional-label-separation">2mm</xsl:attribute>
 <xsl:attribute name="provisional-distance-between-starts">5mm</xsl:attribute>
</xsl:attribute-set>

<xsl:template match="md:item">
 <xsl:variable name="type" select="../@type" />

 <fo:list-item xsl:use-attribute-sets="attsItem">
 <fo:list-item-label end-indent="label-end()">
 <fo:block text-align="end">
 <xsl:attribute name="axf:number-transform">
 <xsl:choose>
 <xsl:when test="$type = 'bullet'">
 <xsl:text>circle</xsl:text>
 </xsl:when>
 <xsl:when test="$type = 'ordered'">
 <xsl:text>1.</xsl:text>
 </xsl:when>
 </xsl:choose>
 </xsl:attribute>
 <xsl:number />
 </fo:block>
 </fo:list-item-label>
 <fo:list-item-body start-indent="body-start()">
 <fo:block>
 <xsl:apply-templates />
 </fo:block>
 </fo:list-item-body>
 </fo:list-item>
</xsl:template>

<xsl:template match="md:list">

<fo:block-container column-count="2">
 <fo:list-block xsl:use-attribute-sets="attsListBlock">
 <xsl:apply-templates />
 </fo:list-block>
</fo:block-container>
</xsl:template>
箇条書き(リスト)です。それぞれの項目が短い場合、1段だと余白がかなり空いてしまいます。AH Formatterではブロックコンテナでも段組みを別に指定できるので、2段組にしてみました。今回使用してはいないものの、数字付き箇条書きでも動作します。CommonMarkのASTでは箇条書きは同じlist構造でtypeプロパティの値が違う形なので、HTMLのようにulとolが分けられているより対応が楽だと感じました。入れ子のリストでの記号の変更も、 <xsl:variable name="nest" select="count(ancestor::list)" />のようにすれば階層が割と簡単に分かりそうです。
ところでこの組版結果は想定とズレていて、ASTの<item>の内部で一度<paragraph>が使われているため、ラベルと項目の間に、通常の段落を想定した段落開始のインデントが入ってしまっています。
インライン記法の変換例を見てみましょう。
<xsl:attribute-set name="attsEm">
 <xsl:attribute name="axf:text-emphasis-style">dot</xsl:attribute>
 <xsl:attribute name="axf:text-emphasis-font-family">Kenten Generic</xsl:attribute>
 <xsl:attribute name="axf:text-emphasis-skip">spaces punctuation symbols narrow</xsl:attribute>
</xsl:attribute-set>

<xsl:template match="md:emph">
 <fo:inline xsl:use-attribute-sets="attsEm">
 <xsl:apply-templates />
 </fo:inline>
</xsl:template>
和文の簡易マークアップで悩ましいemとstrong。AH Fromatterでは圏点の拡張がありますから、emでは圏点を使用してみました。
今回の記事は『スタイルシート開発の基礎 XMLとFOで簡単な本を作ってみよう』[5]を片手に、適宜読み替えながら書き進めてみました。Markdownからの変換はLaTeXやHTML経由でのものが多く、それぞれに長所や特徴がありますが、XSL-FOで1つ1つ記法とFOを確かめながらというのも、組版全般やXSLTの学習がしっかり進んだように感じ、良いものです。
体感としては、一般的なプログラミング言語で同程度の内容を書くよりも3倍くらいの行数になっている感じがします。
*1XSLTとXSL-FOの記法について学習中の人間が執筆しました。誤りが含まれる箇所があるかもしれません。
*2 「不足する」他のものとしては、表示言語などもそうです。多くのXMLアプリケーションでは「xml:lang」や「id」といった情報は<xsl:copy-of>を利用して入力から出力へそのまま渡せますが、CommonMarkのASTにその情報は含まれません。<html_block>の情報としてマークアップを処理する、言語ごとにファイルを分けるなど、手軽な処理とはいかないでしょう。
*3 <template match="/">は個人的な感覚としては一般的なプログラミング言語におけるmain関数に近いので、切り出せる処理を適時追い出し、子の箇所で必要な値(で子からの取得が面倒なもの)については<xsl:with-param>で渡しています。<xsl:attribute>は調整する可能性がないものは<xsl:template>内でハードコード、そうでなければxsl:use-attribute-setsで別に切り出しています。2ページもない文書を処理するにしては冗長かもしれません。
参考資料
- [1] https://github.com/commonmark/cmark
- [2] https://commonmark.org/
- [3] 構造化文書とは – アンテナハウス
- [4] Markdown + XSL → PDF
- [5] スタイルシート開発の基礎 – アンテナハウス


![]()